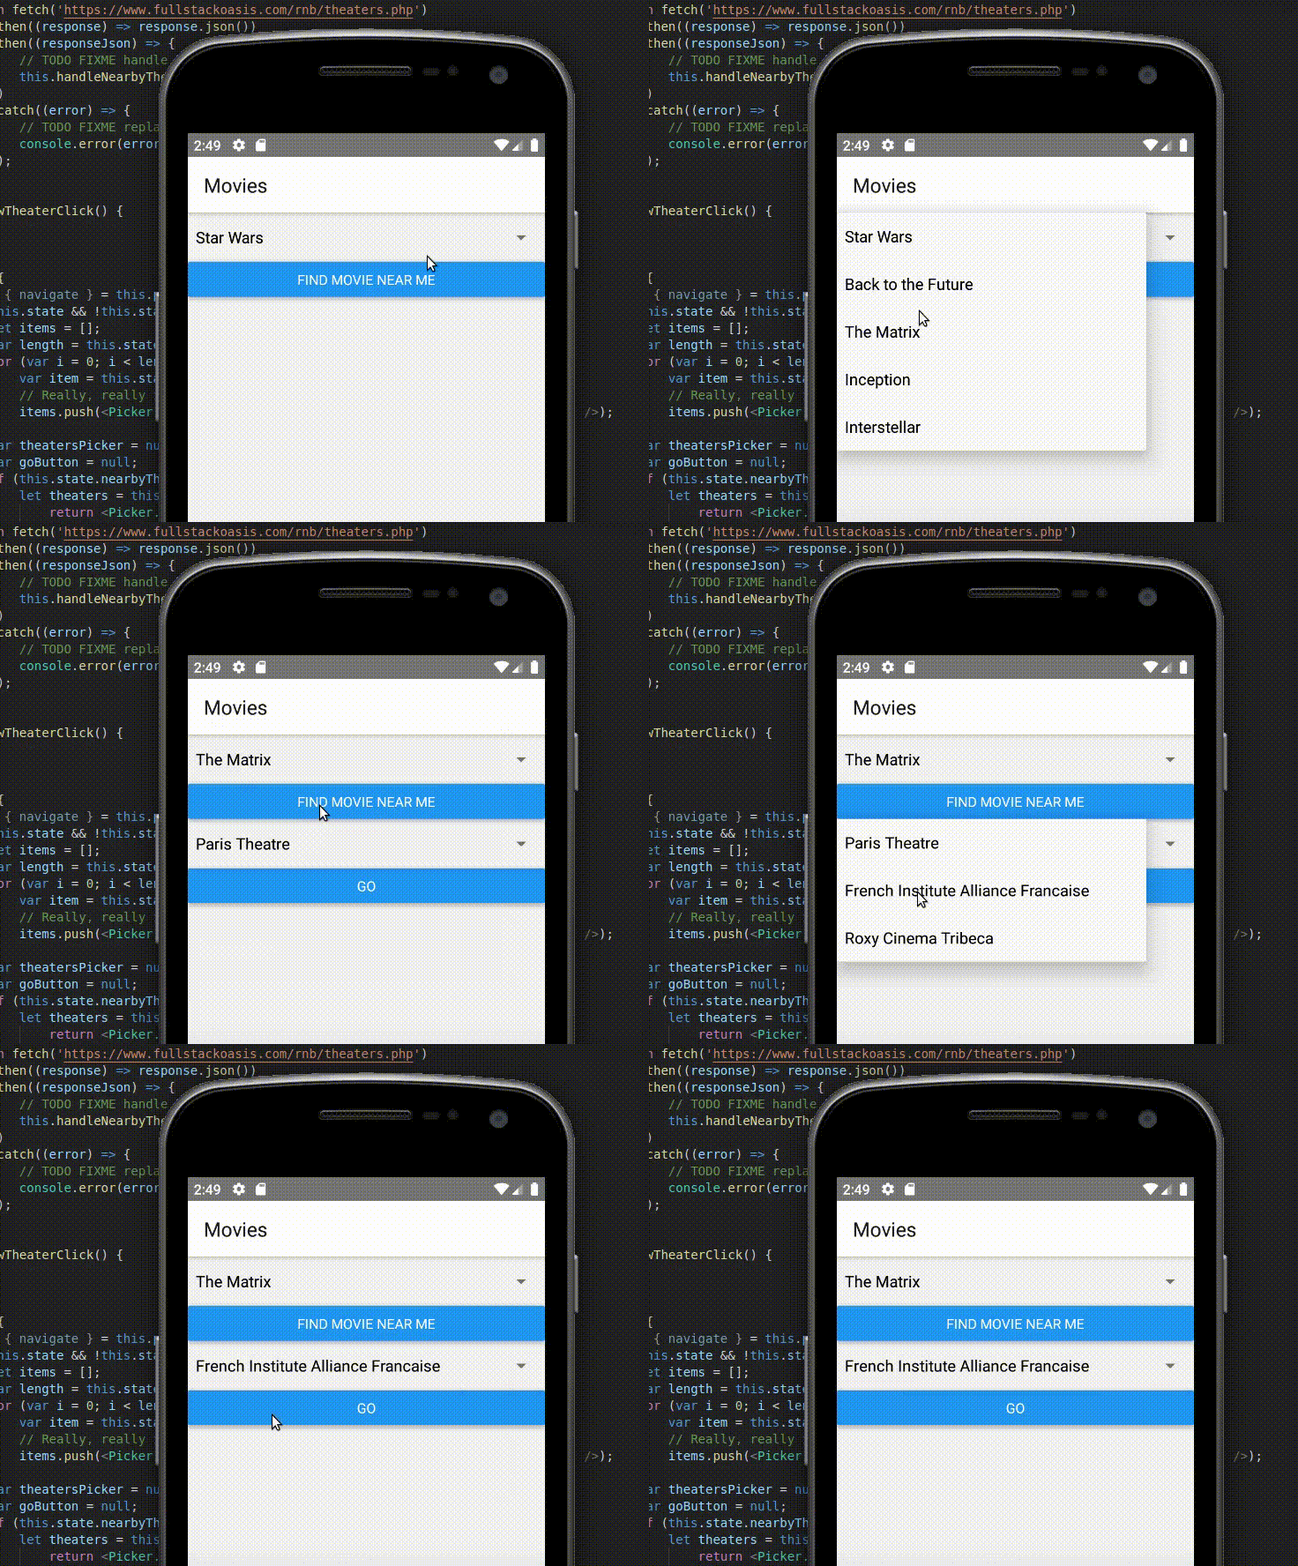
In previous posts (start here), I’ve written about building a movie app that a person can use to pick a movie from a list, and then click a button to display theaters where the movie is being shown.
Let’s add some code which allows our user to select a specific theater. Upon doing that, a button will appear which will take them to a new page in the app.
I only want the new button to appear when the list of theaters is populated. Here’s how I ensure that:
render() {
    if (this.state && !this.state.isLoading) {
        ...
        var theatersPicker = null;
        var goButton = null;
        if (this.state.nearbyTheaters) {
            ...
            theatersPicker = <Picker>{theaters}</Picker>
            goButton = <Button onPress={this.handleShowTheaterClick.bind(this)} title="Go"></Button>;
        }
        return <View>
        ...
            <Button onPress={this.handleClick.bind(this)} title="Find Movie Near Me"></Button>
            {theatersPicker}
            {goButton}
        </View>;
The goButton has been initialized to null. It will only be set to a Button if the theatersPicker has a list of theaters. I also added a new, empty method called handleShowTheaterClick (not shown here). The new button will call handleShowTheaterClick when clicked, but since it’s empty, it won’t do anything yet. We’ll get to that later.
You’ll find that the {goButton}line doesn’t show anything if goButton is null. That’s the UX that we want.
At this point, I want handleShowTheaterClick to cause the app to display a new page. This behavior is new! So far, everything has been happening in a single page. We’re getting into navigation, also known as “routing”. It’s how users get around the app from one page to another.
Navigation is not built into the default React Native install. You have to install it as a separate package. I followed the [instructions for doing this as given in the documentation][2], but I got a lot of warnings. It took me about 30 minutes to resolve them, ugh! I kept trying and retrying… One of the errors that I saw in the Metro server terminal window looked like this:
error: bundling failed: Error: Unable to resolve module `react-navigation-stack` from `App.js`: react-navigation-stack could not be found within the project.

If you are sure the module exists, try these steps:
 1. Clear watchman watches: watchman watch-del-all
 2. Delete node_modules: rm -rf node_modules and run yarn install
 3. Reset Metro's cache: yarn start --reset-cache
 4. Remove the cache: rm -rf /tmp/metro-*
This turned out to be misleading. I thought that I need to use yarn, so I installed it, and started using it according the instructions. It could be that this works for some setups, but I’m running Ubuntu 16.04, and I’ve been using npm throughout this exercise. I should have stuck with npm. I learned that if a message mentioned yarn, I should just use npm instead. I suggest you do the same, unless you’re already using yarn to run other commands.
When I finally switched back to using npm, I found there were some warnings about “peer dependencies”. Here is one example:
...
npm WARN @typescript-eslint/eslint-plugin@1.13.0 requires a peer of eslint@^5.0.0 but none is installed. You must install peer dependencies yourself.
I wound up installing each peer dependency when I saw that one was missing. Then I had to go back and install the package which required the dependency again (so it seemed). In the end, I did all these installs in my project root (where App.js lives), in the order given:
npm install eslint@^5.0.0
npm install typescript@>=3.7.0-dev
npm install react-native-gesture-handler@*
npm install @react-native-community/masked-view@^0.1.1
npm install react-native-safe-area-context@^0.6.0
npm install react-navigation-stack
npm install react-navigation
Installing all that stuff was kind of a headache, and I was happy when it was finally done.
A quick read of the navigation documentation told me that I should only have navigation code in my App.js file. My existing application logic should go into a separate “screen” page. I’ll call this new page MoviesScreen.
To do this, I copied all the source of App.js into a new file, which I named MoviesScreen.js. Then I replaced HelloWorldApp in that source with MoviesScreen. Really, just replace
export default class HelloWorldApp extends Component {
with
export default class MoviesScreen extends Component {
Next, I replaced all the code in App.js with this simple navigation code:
import { createAppContainer } from 'react-navigation';
import { createStackNavigator } from 'react-navigation-stack';
import MoviesScreen from './MoviesScreen';

const MainNavigator = createStackNavigator({
    Movies: { screen: MoviesScreen }
});

const App = createAppContainer(MainNavigator);

export default App;
After doing this, I ran npx react-native run-android in my project root. I’ve learned that running npx react-native run-android sometimes clears up errors, although I’m not exactly sure when or if it’s required (might be a superstition type thing!).
The net result was that my app looked almost exactly the same as it did before! That’s expected, and good, because I only made infrastructure changes, and no functional ones. The only difference now is that there’s a title bar at the top of the display. It reads “Movies”. It’s not beautiful, but I’ll figure out how to deal with that later.
In testing the latest version of my app, I notice there’s one problem: when I select a theater from my “theaters” Picker, the value doesn’t stay selected. I know how to fix that – the same way that I did it for the “movies” Picker. I add similar code for that in MoviesScreen‘s render method:
...
theatersPicker = <Picker selectedValue={this.state.theater}
    onValueChange={(itemValue, itemIndex) => this.setState({ theater: itemValue })
    }>{theaters}</Picker>

Now, my app just works, except for one little problem. The GO button does nothing! Clicking on it should take the user to a new page. I’ll work that out in my next post.
The source code for this new version of App.js and for MoviesScreen are available online.
